Adafruit Terminal PiCowbell for Pico - Reset Button & STEMMA QT
Ding dong! Hear that? It's the PiCowbell ringing, letting you know that the new Adafruit Terminal PiCowbell is finally in stock and ready to assist your Raspberry Pi Pico and Pico W project with handy hardware and practical prototyping with screw terminal blocks for each and every pin.
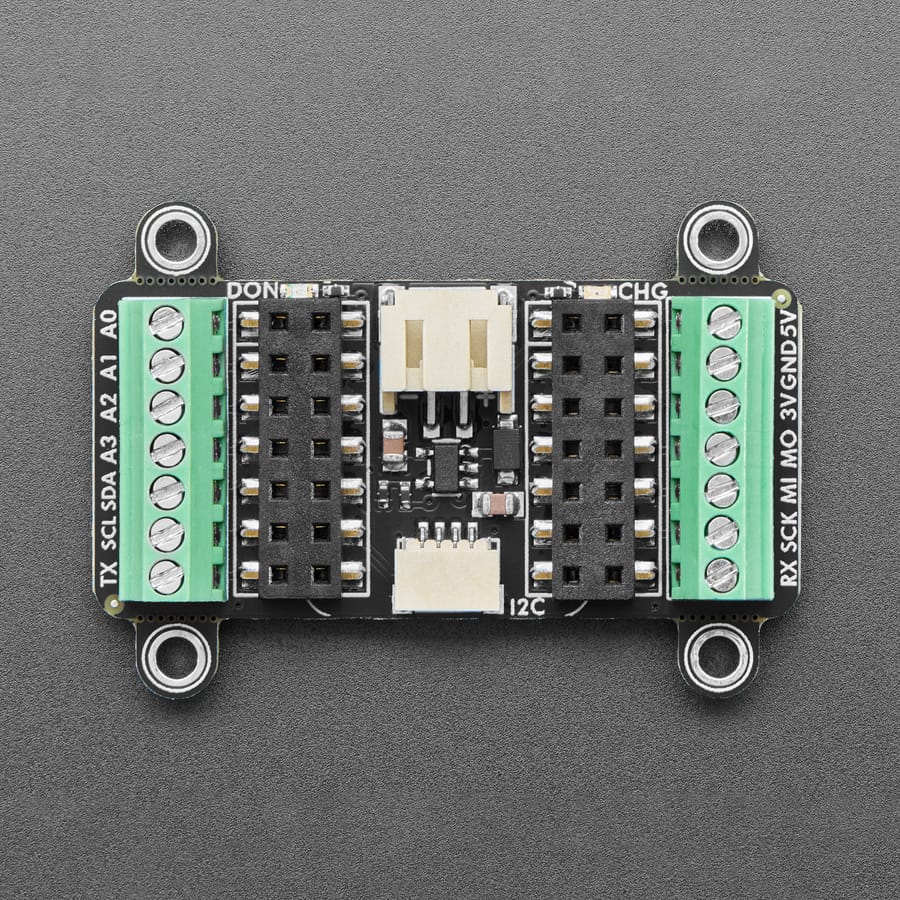
This board is ideal for when you want quick access to connect solid or stranded core wires to any of the GPIO pads on the Pico. We use four 10-pin 2.54" pitch screw terminal blocks that can fit 18~26 AWG solid or stranded core wires. Note that we really connect every pin 1-to-1 so there will be plenty of ground connects!
Please Note! To keep things flexible, this PiCowbell does not come with socket or pin headers, even though we have some example photos with not-included socket headers installed. There are many possible configurations, and we stock various headers depending on how you want to solder and attach them. This is especially true if you want the Pico on top so that the BOOTSEL button and LED are accessible.
- Use the Pico Stacking Headers if you want to plug into a breadboard or other accessory with sockets.
- Use the Pico Socket Headers if you want to plug directly in and have a nice, solid connection without any poking-out bits.
- Use the Short Socket Headers for a very slim but pluggable design, note that you'll want to trim down the Pico's headers or use the short plug headers on the Pico to have a skinny sandwich.
- Solder the PCB directly to the Pico headers - of course, this is very compact and inexpensive, but you won't be able to remove the PiCowbell.
The Terminal PiCowbell provides you with:
- Screw Terminal blocks for each matching pad on the Pico or Pico W: 40 total pins, 40 total blocks
- Right angle reset button that sticks out the end
- Right angle JST SH connector for I2C / Stemma QT / Qwiic connection. Or can use it for plain GPIO wiring if you don't have any I2C devices to attach. Provides 3V, GND, IO4 (SDA), and IO5 (SCL)
There is an extra set of 4 breakout holes next to the JST SH in case you want more I2C connections or want to re-assign the I2C port. - 15 rows of 8-hole connected strips in the centre area. You can cut the traces between the holes, but they're intended to be treated like a mini-mini breadboard
- Every pad on the Pico has a duplicate hole pad next to it for solder-jumpering
- The ground pads have white silkscreen rectangles to easily identify, plus one long ground strip near the reset button
- One long strip of connected holes for 3.3V power
- Gold-plated pads for easy soldering
We do not have I2C pullups on the board, but your Qwiic/QT breakout board or accessory likely already has them onboard. If using the Philhower Arduino core, the Wire peripheral is already set up to use IO4 and IO5. If using CircuitPython or MicroPython, you'll need to let the code know to look at 4+5 for SDA+SCL pins.
Specifications
- Dimensions: 52.1mm x 43.1mm x 10.6mm
- Weight: 16.1g
Resources


Description
Ding dong! Hear that? It's the PiCowbell ringing, letting you know that the new Adafruit Terminal PiCowbell is finally in stock and ready to assist your Raspberry Pi Pico and Pico W project with handy hardware and practical prototyping with screw terminal blocks for each and every pin.
This board is ideal for when you want quick access to connect solid or stranded core wires to any of the GPIO pads on the Pico. We use four 10-pin 2.54" pitch screw terminal blocks that can fit 18~26 AWG solid or stranded core wires. Note that we really connect every pin 1-to-1 so there will be plenty of ground connects!
Please Note! To keep things flexible, this PiCowbell does not come with socket or pin headers, even though we have some example photos with not-included socket headers installed. There are many possible configurations, and we stock various headers depending on how you want to solder and attach them. This is especially true if you want the Pico on top so that the BOOTSEL button and LED are accessible.
- Use the Pico Stacking Headers if you want to plug into a breadboard or other accessory with sockets.
- Use the Pico Socket Headers if you want to plug directly in and have a nice, solid connection without any poking-out bits.
- Use the Short Socket Headers for a very slim but pluggable design, note that you'll want to trim down the Pico's headers or use the short plug headers on the Pico to have a skinny sandwich.
- Solder the PCB directly to the Pico headers - of course, this is very compact and inexpensive, but you won't be able to remove the PiCowbell.
The Terminal PiCowbell provides you with:
- Screw Terminal blocks for each matching pad on the Pico or Pico W: 40 total pins, 40 total blocks
- Right angle reset button that sticks out the end
- Right angle JST SH connector for I2C / Stemma QT / Qwiic connection. Or can use it for plain GPIO wiring if you don't have any I2C devices to attach. Provides 3V, GND, IO4 (SDA), and IO5 (SCL)
There is an extra set of 4 breakout holes next to the JST SH in case you want more I2C connections or want to re-assign the I2C port. - 15 rows of 8-hole connected strips in the centre area. You can cut the traces between the holes, but they're intended to be treated like a mini-mini breadboard
- Every pad on the Pico has a duplicate hole pad next to it for solder-jumpering
- The ground pads have white silkscreen rectangles to easily identify, plus one long ground strip near the reset button
- One long strip of connected holes for 3.3V power
- Gold-plated pads for easy soldering
We do not have I2C pullups on the board, but your Qwiic/QT breakout board or accessory likely already has them onboard. If using the Philhower Arduino core, the Wire peripheral is already set up to use IO4 and IO5. If using CircuitPython or MicroPython, you'll need to let the code know to look at 4+5 for SDA+SCL pins.
Specifications
- Dimensions: 52.1mm x 43.1mm x 10.6mm
- Weight: 16.1g